这篇文章主要为大家详细介绍了IOS网络嗅探功能实现代码,具有一定的参考价值,感兴趣的小伙伴们可以参考一下
本文实例为大家分享了IOS网络嗅探工具,供大家参考,具体内容如下
一、效果图
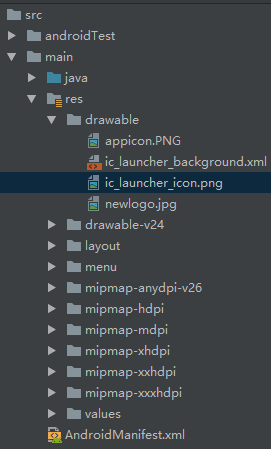
二、工程图
AppDelegate.h
#import <UIKit/UIKit.h>
#import "Reachability.h"

@interface AppDelegate : UIResponder <UIApplicationDelegate>
{
   Reachability *reachability;
   BOOL WarningViaWWAN;
}

@property (strong, nonatomic) UIWindow *window;


- (void)ReachabilitySniff:(Reachability*) curReach;
- (void)ReachabilitySniffNotification:(NSNotification* )notification;
- (void)alertView:(UIAlertView *)alertView clickedButtonAtIndex:(NSInteger)buttonIndex;

@end
AppDelegate.m
#import "AppDelegate.h"
#import "RootViewController.h"

@implementation AppDelegate

- (BOOL)application:(UIApplication *)application didFinishLaunchingWithOptions:(NSDictionary *)launchOptions
{
  self.window = [[UIWindow alloc] initWithFrame:[[UIScreen mainScreen] bounds]];
  // Override point for customization after application launch.

  RootViewController *rootVC=[[RootViewController alloc]init];
  UINavigationController *nav=[[UINavigationController alloc]initWithRootViewController:rootVC];
  self.window.rootViewController=nav;


  //启动网络嗅探功能
  WarningViaWWAN = TRUE;

  [[NSNotificationCenter defaultCenter] addObserver:self selector:@selector(ReachabilitySniffNotification:) name:kReachabilityChangedNotification object:nil];

  if (!reachability) {
    reachability = [Reachability reachabilityForInternetConnection];
  }
  [reachability startNotifier];

  [self performSelector:@selector(ReachabilitySniff:) withObject:reachability afterDelay:20];


  self.window.backgroundColor = [UIColor whiteColor];
  [self.window makeKeyAndVisible];
  return YES;
}
#pragma mark -网络嗅探
- (void)ReachabilitySniffNotification:(NSNotification* )notification
{
  Reachability* curReach = [notification object];
  [self performSelector:@selector(ReachabilitySniff:) withObject:curReach afterDelay:2];
}

- (void)ReachabilitySniff:(Reachability*) curReach
{
  NSLog(@"ReachabilitySniffNewWorkStatus");
  if (!curReach) {
    return;
  }
  NetworkStatus status = [curReach currentReachabilityStatus];
  switch (status) {
    case ReachableViaWiFi:
    {
      UIAlertView *alert = [[UIAlertView alloc] initWithTitle:@"您正在使用WiFi网络" message:Nil delegate:self cancelButtonTitle:Nil otherButtonTitles:@"本次不再提醒",@"知道了", nil];
      [alert show];
      break;
    }
    case ReachableViaWWAN:
    {
       UIAlertView *alert = [[UIAlertView alloc] initWithTitle:@"您正在使用移动网络,运营商会收取流量费,建议使用WiFi网络" message:Nil delegate:self cancelButtonTitle:Nil otherButtonTitles:@"本次不再提醒",@"知道了", nil];
        [alert show];
       break;
    }
    case NotReachable:
    {
      UIAlertView *alert = [[UIAlertView alloc] initWithTitle:@"没有网络" message:Nil delegate:self cancelButtonTitle:Nil otherButtonTitles:@"本次不再提醒",@"知道了", nil];
      [alert show];
      break;
    }
  }
}
以上就是本文的全部内容,希望对大家的学习有所帮助,也希望大家多多支持编程学习网。
沃梦达教程
本文标题为:IOS代码笔记之网络嗅探功能


猜你喜欢
- Android MaterialButton使用实例详解(告别shape、selector) 2023-06-16
- Android实现轮询的三种方式 2023-02-17
- 最好用的ios数据恢复软件:PhoneRescue for Mac 2023-09-14
- 详解flutter engine 那些没被释放的东西 2022-12-04
- SurfaceView播放视频发送弹幕并实现滚动歌词 2023-01-02
- Android studio实现动态背景页面 2023-05-23
- iOS 对当前webView进行截屏的方法 2023-03-01
- Flutter实现底部和顶部导航栏 2022-08-31
- 作为iOS开发,这道面试题你能答出来,说明你基础很OK! 2023-09-14
- Android实现监听音量的变化 2023-03-30