这篇文章主要为大家详细介绍了Unity3D选择本地图片并加载,文中示例代码介绍的非常详细,具有一定的参考价值,感兴趣的小伙伴们可以参考一下
本文实例为大家分享了Unity3D选择本地图片并加载的具体代码,供大家参考,具体内容如下
①找到System.Windows.Forms.dll:在unity的安装目录中找到它,如
E:\ProgramFiles(x86)\Unity\Editor\Data\Mono\lib\mono\2.0
②设置.NET 2.0集:Untiy默认是.NET 2.0 Subset。在Edit->Project Settings->Player->OtherSettings中修改
③任意打开一项目,新建Plugins文件夹,将找到的System.Windows.Forms.dll复制进去工程文件中(Project)
using UnityEngine;
using System.Collections;
using System;
using System.Windows.Forms;
using System.IO;
using UnityEngine.UI;
public class AddHead : MonoBehaviour {
 private Texture2D img=null;
 public Image image;
 public Sprite sprite;
// Use this for initialization
 void Start () {
 }
 // Update is called once per frame
 void Update () {
 }
 /*void OnGUI(){
 if (GUI.Button (new Rect (0, 0, 100, 20), "选择文件")) {
 }*/
 public void addhead(){
 OpenFileDialog od=new OpenFileDialog();
 od.Title="6K+36YCJ5oup5aS05YOP5Zu+54mH";
 od.Multiselect=false;
 od.Filter="图片文件(*.jpg,*.png,*.bmp)|*.jpg;*.png;*.bmp";
 if(od.ShowDialog()==DialogResult.OK){
 //Debug.Log(od.FileName);
 StartCoroutine(GetTexture("file://"+od.FileName));
 }
 /*if (img != null) {
 //GUI.DrawTexture(new Rect(0,20,img.width,img.height),img);
 image.sprite=sprite;
 }*/
 }
 IEnumerator GetTexture(string url){
 WWW www = new WWW (url);
 yield return www;
 if (www.isDone && www.error == null) {
 img=www.texture;
 sprite=Sprite.Create(img,new Rect(0,0,img.width,img.height),new Vector2(0.5f,0.5f));
 image.sprite=sprite;
 //Debug.Log(img.width+" "+img.height);
 byte[] date=img.EncodeToPNG();
 }
 }
}
为按钮绑定一个addhead()的方法
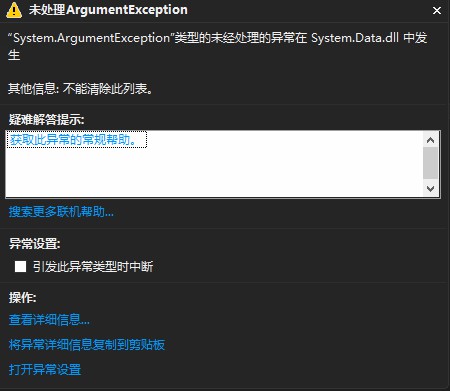
在编辑器运行,当出现此弹窗,确定忽略即可。发布成桌面客户端是不会有这个弹窗的。
看运行效果
——》
——》
以上就是本文的全部内容,希望对大家的学习有所帮助,也希望大家多多支持编程学习网。
沃梦达教程
本文标题为:Unity3D选择本地图片并加载


猜你喜欢
- c# 模拟线性回归的示例 2023-03-14
- 如何使用C# 捕获进程输出 2023-03-10
- Unity3D实现渐变颜色效果 2023-01-16
- 在C# 8中如何使用默认接口方法详解 2023-03-29
- Unity Shader实现模糊效果 2023-04-27
- Oracle中for循环的使用方法 2023-07-04
- WPF使用DrawingContext实现绘制刻度条 2023-07-04
- user32.dll 函数说明小结 2022-12-26
- C# 使用Aspose.Cells 导出Excel的步骤及问题记录 2023-05-16
- .NET CORE DI 依赖注入 2023-09-27
